Considering that, we are building the mobile app from moodle mobile app codebase. In order to use the push notification feature using airnotifer, following steps are required.
Airnotifier Installation And Setups
app release version github tag : https://github.com/moodlehq/moodleapp/releases/tag/v3.9.4
airtnotifier version : 3 https://github.com/airnotifier/airnotifier/
server environment : ubuntu
moodle version : 3.8
Airnotfier Setup
it requires python, so check the python version.
 >>> python --version

# make a directory to check the airnotifier from git, so lets say you are at home directory
>>> cd ~

## check out source code
>>> git clone -b master git://github.com/airnotifier/airnotifier.git

# install python3 build tools
>>> apt-get install python3-pip build-essential git

# into checked out code directory
>>> cd airnotifier

# setup python3 env
>>> pip3 install pipenv --user

# in my case, python3 was available with command python3
>>>  python3 -m pipenv install --deploy
>>> cp config.py-sample config.py

# there is nothing to change as sample has everything.
# it will require mongo db in order to run, if you do not have
>>> echo "deb http://repo.mongodb.org/apt/debian buster/mongodb-org/4.4 main" | sudo tee /etc/apt/sources.list.d/mongodb-org-4.4.list
 >>> sudo apt-get update
 >>> sudo apt-get install -y mongodb-org
 >>>  sudo apt-get install -y mongodb-org
 >>>  sudo systemctl start mongod
 >>>  sudo systemctl status mongod

# install airnotifier
>>> python3 -m pipenv run ./install.py
>>> python3 -m  pipenv run ./app.py
Imp-1 : make sure the port mentioned in conifg.py /8801 is accessible from outside world , if not check ufw or firewall setting to allow port
Imp-2 : In order to run this without interrupting, you can utilize screen so that it run’s on virtual terminal that does not end after your session.
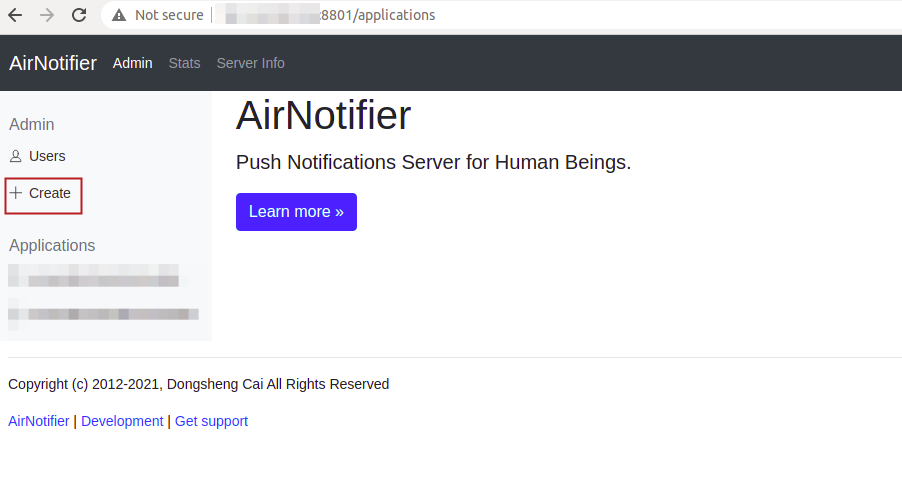
you can try accessing : In your browser: http://your_server_ip_address:8801 – Login as admin@airnotifier/admin
Create an app with the package name :-
Now , you need to do few more setup in regards of usage and that will depend upon the app type
Mobile App Configuration
Android App Configuration
- In order to use this on Android Platform, you need to create a project in firebase. https://console.firebase.google.com
- Create a project and go to project settings
- create an android app there and download google-service.json
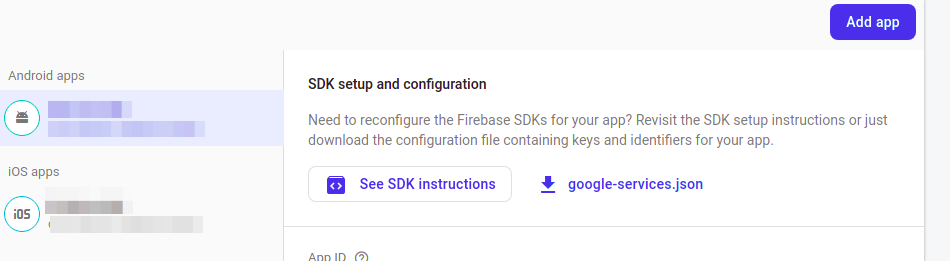
- Put that google-service.json in ionic moodle app codebase at root location [there are other files like config.xml, package.json etc]
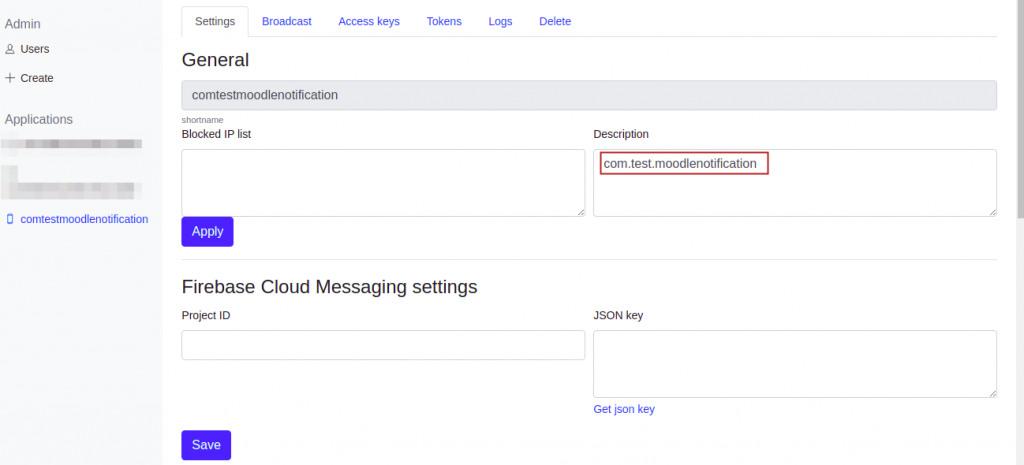
- Copy the project Id from Firebase Console project settings
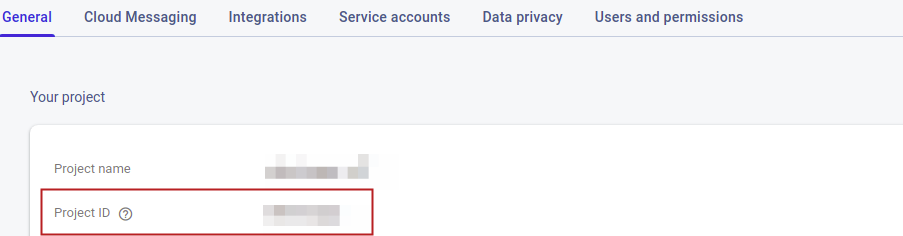
- put it under airnotifer “Firebase Cloud Messaging settings” section, project id and content of google-service.json
Now it is to setup the Moodle Codebase so that Notification can be pushed to Airnotifier.
IOs App Configuration
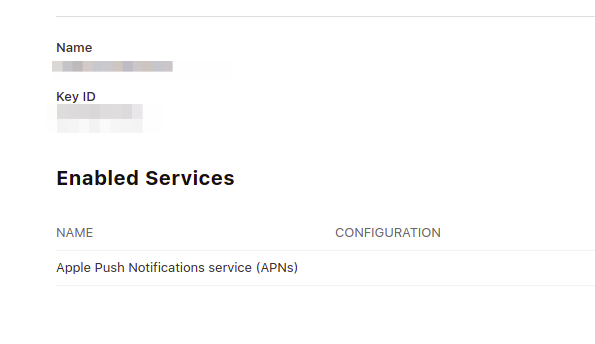
- IN order to connect the ios, you need to put few information in airnotifier that can be gathered from https://appstoreconnect.apple.com/
- Team ID : can be gathered from membrship page : https://developer.apple.com/account/
- App bundle ID : package name : <com.test.moodlenotificaiton>
https://developer.apple.com/account/resources/authkeys/list
- Key ID : <you can create and it will be available >
- Key File [p8 content]:
Imp- IOs notification can not be tested on Emulator.
Setup Moodle and Airnotifier
- under <moodleurl>/admin/message.php or Site administration > Messaging > Notification settings , enable Mobile Notification.
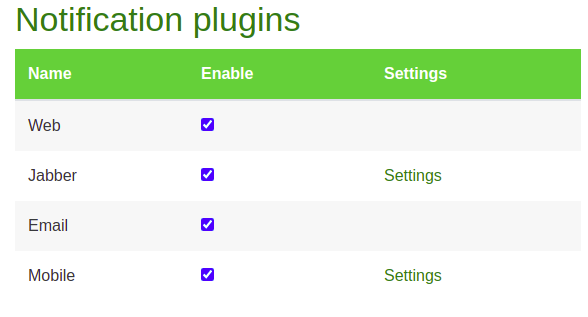
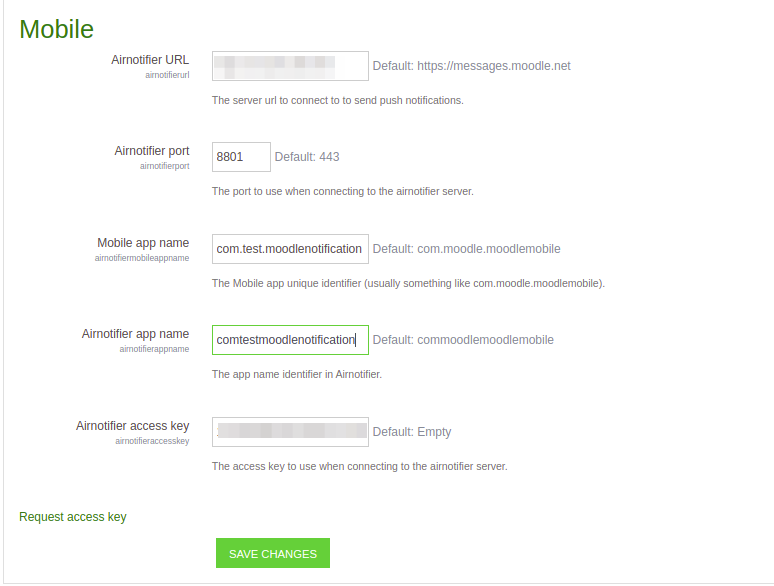
- Click on Settings , and put the requried detail
- Airtnotifier url, port number, package, airtnoifier app name [can be copied for airnotifier], Access key [ you can create that from air notifier app section]
So the setup part is done.
Important Points And How to Debug
Important Points
1- as this has custom package name, so please make sure you have changed this under Site administration > Mobile app > Mobile appearance Android app’s unique identifier section in moodle codebase
2- Android Notification can be tested on virtual device as well.
3: If your app crashes on receving notification while app is open
- go to file message/output/airnotifier/message_output_airnotifier.php
- edit file and go to line number 125, put the following code
- unset($extra->notification);
$curl->setopt(array('CURLOPT_TIMEOUT' => 2, 'CURLOPT_CONNECTTIMEOUT' => 2));
 $curl->setHeader($header);
// put the follwing line after above lines
 unset($extra->notification);
How to Debug
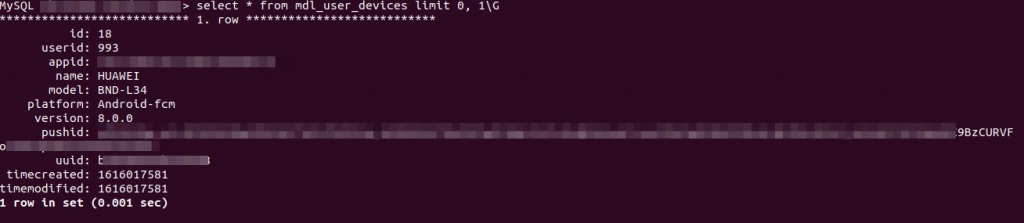
- As soon as you launch app , Server will register this. check the token from mdl_user_devices table
- jsut try to send a message from admin to your app user from moodle interface and check in airtnotifer > <your app> > logs section.

if you get this , it means your moodle is communicating with Airnotifier Server. If not , it means there is problem as moodle is not able to push the message to airnotifer. jsut recheck moodle airnotifer setting again.
I have done setup for Firebase Cloud Messaging settings (Project ID and JSON key). But when I tried to send broadcast message, nothing happened. FYI, when I tried to send message from firebase, my Moodle app can receive the notification. I think in somewhere, AirNotifier is unable to connect to Firebase. Do you have any suggestions what to check or where to see any logs? I have been struggling on this issue at least since last month.
Not sure about your configuration, but you can run airnotifier from command line [pipenv run ./install.py] and there will be logs.
What i assume, you have successfully connected airotnotifer with moodle. ports are open and internet is available on aironotifier server.
you try to send message from moodle.
debugging :
check the moodle logs [doign debuggin on ], if message is bradcasted using airnotifer and there is no issues
check the airnotifer logs [coommand line will show the output if apis is being called]
the check the logs under airnotifier web view
Hey,
I’m experiencing some problems getting Device Token on Android Mobile Custom App. I’m following this steps app -> App settings -> About -> Click at app version -> Push notification ID regarding to this documentation https://docs.moodle.org/dev/Sending_custom_Push_Notifications_to_the_Moodle_App but the Device Token doesn’t show up.
When I follow the same steps on IOS device the Token is showing correctly.
Which can be the problem with Android?
Thanks in advance!
Hi Aldo, I have the same issue as you described in your post. I cannot get the device token on my Android custom app. Did you ever find a solution for this problem? I would appreciate your help. Thanks.
I was able to setup. i hope you followed the same steps.
do you see any error logs on moodle site or airnotifier site ?
First, I’d to thank you for the tutorial!
Second, I’m trying to set up Airnotifier with Moodle 4.0 but I encountered this error: https://moodle.org/mod/forum/discuss.php?d=391095#p1773390
On Moodle 3.11 it works fine without any errors
Can you help me thanks in advance!